This is part two of my series in building a VFR LED Sectional Map.
You can find part one here
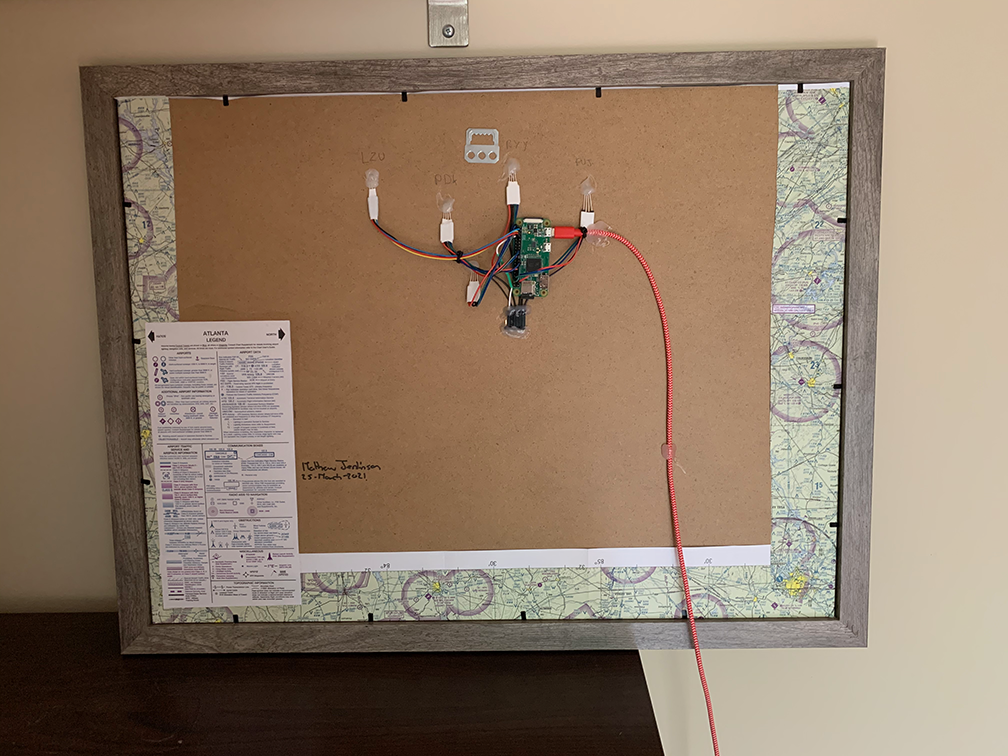
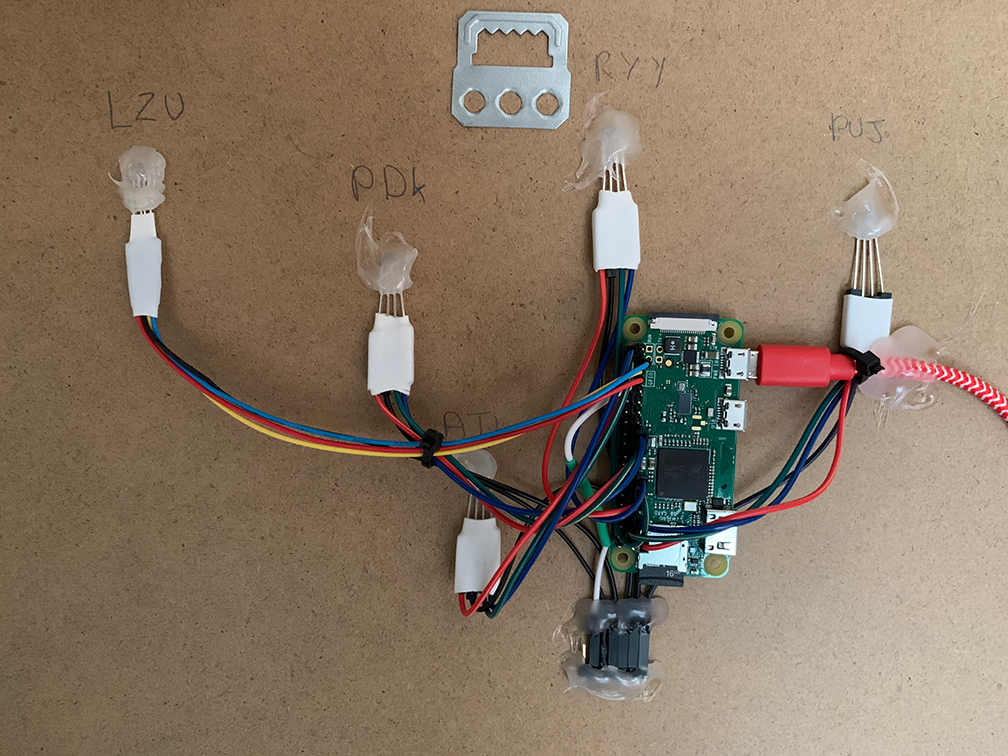
In my last post I talked about how to build the hardware, gluing the sectional map to the picture frame, attaching the LED’s and wiring up the RaspberryPi.
This post focuses on the software component.
There are two parts to the software project here.
1. Getting the weather for the appropriate airports
2. Converting the weather conditions into an LED color and sending to the correct LED.
If you just need the code, GitHub here.
I chose to write this script in Python because of how easy it is to use RPi.GPIO to interface with the GPIO Pins on the RaspberryPi.
As mentioned, Im using a RaspberryPi Zero Wireless, I picked this unit for two reasons;
1. It’s low powered
2. It’s got wifi
In the GitHub repo you will find a Python Script called metarManager.py, this script is used to gather the METAR data and then update the LED’s based on the METAR report.
As each LED is a tricolor LED, I grouped them all together based on Airport and corresponding GPIO pins.
eg: ‘KPDK’:(19,21,23)
Is PDK Airport, with Red Pin 19, Green Pin 21 and Blue Pin 23.
For information on how to turn on/off LED’s using the GPIO, please see this guide.
For the weather API, I found this awesome weather service called avwx.rest, this service reads and returns tons of JSON data on an airport, including weather, runways and altimeter settings. Part of that response object is a value called ‘flight_rules’.
Side note – What are flight rules?
Flight rules are regulations and procedures adopted for flying aircraft in various conditions.
They come in two flavors: VFR and IFR.
Whats VFR?
VFR stands for visual flight rules, and the term refers to a set of rules created by the FAA for flight in VMC, or visual meteorological conditions.
VFR rules cover visibility requirements and cloud clearance criteria required to fly with visual reference to the ground and/or horizon. These visibility and cloud clearance requirements vary depending on the type of airspace you’re flying in, but they exist to ensure that pilots flying VFR don’t get caught up in the clouds and crash into each other.
Whats IFR?
IFR stands for instrument flight rules – the set of rules that govern aircraft that fly in IMC, or instrument meteorological conditions. In general terms, instrument flying means flying in the clouds. More specifically, IMC is defined as weather that is “below the minimums prescribed for flight under Visual Flight Rules.”
It’s called instrument flight because the pilot navigates only by reference to the instruments in the aircraft cockpit. Flying in the clouds (IMC) requires an IFR flight plan and an instrument rating.
In some online services such as skyvector and foreflight they blend maps and visual information to help pilots get an accurate picture of what’s going on in the area.
See example:
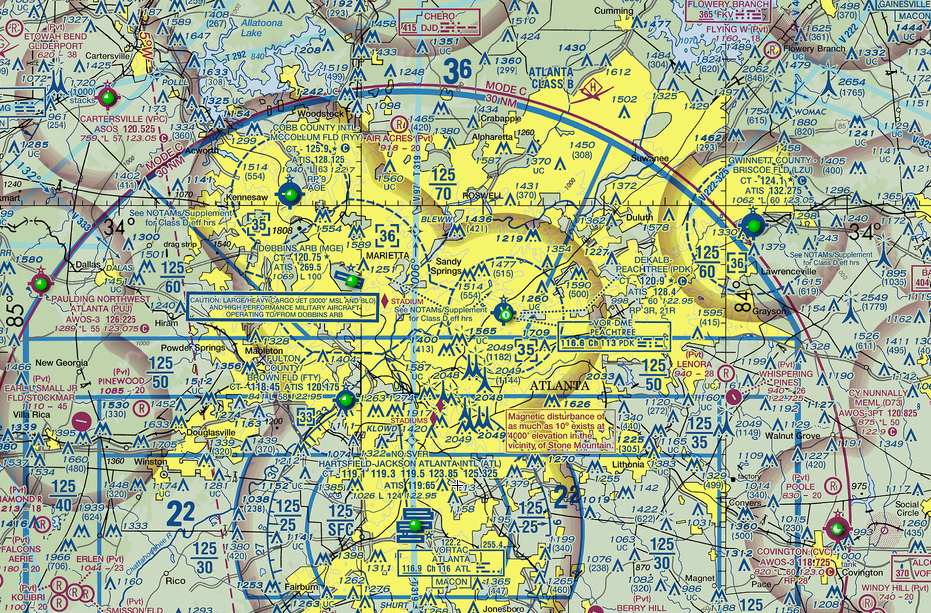
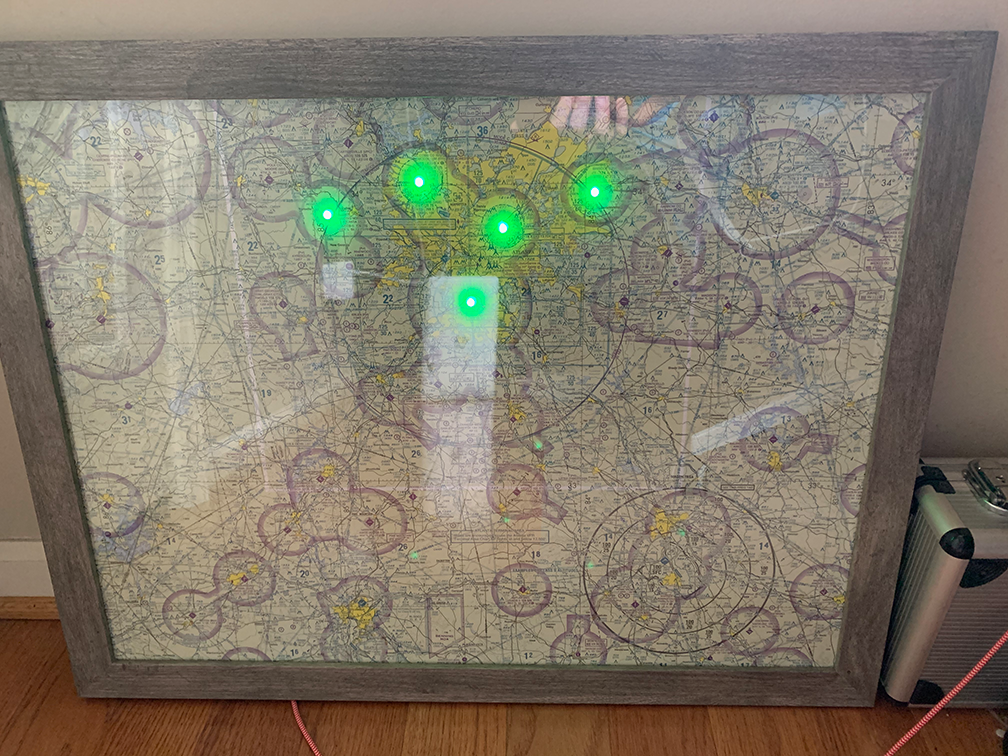
All Green Means good flying
In these cases, colors are also used to help identify maps and visual information.
Green for VFR rules
Blue for Marginal VFR rules
Red for IFR rules
Purple for Marginal IFR rules (this is usually REALLY bad weather!)
As you can see from the image, Atlanta is in the green today which means it’s a great day to go flying.
By reading the flight rules property from the API, we can quickly pair the appropriate color on the LED.
Using simpleJSON paired with Python’s URL Library I wrote a function that can get METAR data on each airport in my array and return back the flight rules.
def getMetar(airportCode):

url = 'https://avwx.rest/api/metar/'+airportCode+'?format=json'

hdr = { 'Authorization' : apiKey }
try:

metarRequest = urllib.request.Request(url, headers=hdr)

response = urllib.request.urlopen(metarRequest)

metarResponse = response.read().decode('utf-8')

jsonMetar = json.loads(metarResponse)
if jsonMetar['flight_rules'] == 'VFR':

flightRulesObject[airportCode] = 'GREEN'
if jsonMetar['flight_rules'] == 'MVFR':

flightRulesObject[airportCode] = 'BLUE'
if jsonMetar['flight_rules'] == 'IFR':

flightRulesObject[airportCode] = 'RED'
if jsonMetar['flight_rules'] == 'LIFR':

flightRulesObject[airportCode] = 'PURPLE'
# flightRulesObject[airportCode] = jsonMetar['flight_rules']
if len(flightRulesObject) == len(ledPins):

# print(flightRulesObject)

updateLEDsFromMETARs()
except e:

print(e)

flightRulesObject[airportCode] = 'OFF'
You can see here that the function injects the correct airport code into the URL then makes the request.
Once it has its response we add all the data to the flight rules object and call the function to update the LED’s.
Once the colors on the LED’s are updated, I sleep the unit for 55 mins then run a cron job to reopen the script again on the hour, as METAR information is updated hourly this will keep the LED’s up to date with the latest weather.