During construction I’ve found that the use of 3d printing of parts, tools and components has accelerated the build time and also increased the quality of the end result. 

Let me take you through a few parts that I’ve built so far. 

Radio Antenna Core Holder

All of the comm, nav and radio antennas used the the project are all fed through 3 ferrite cores that helps reduce the noise on the line. In the assembly manual they recommend that you use heat shrink tubing to secure each core to the line. However this does nothing to secure the cores to the body of the aircraft. 

What if something jabs or pulls at the core by accident. 

Enter printed component 1, a ferrite core holder that can be attached to wings, fuselages and any flat surface. It’s a two component design with identical top and base that clamshell together. 

Here’s the design in CAD:

Ferric Core Holder

Here’s final assembly of the radio antenna and part.

3D part being installed

3D part being installed

Thoughts and conclusions;

The part was intentionally made to be a block rather than rounded surfaces. 

I wanted something that could be easily printed with a single component you could reuse without having to print a top and a bottom. 

There is enough material, that if you sand and round the top block once you have everything fixed in place. 

The flat surface allows you to fix the base to a bulkhead or fuselage and if you wanted to you could glass over the top with minimal work. 

You can find a copy of the file here.

Landing Gear Hydraulic Line Holders

Both the aluminum and flexible hose lines for the landing gear always look smarter when they are tidy and can’t move around. 

I was lucky enough to get a tour of a Gulfstream jet where they opened some of the panels and I was wow’ed at how neat all the lines and connectors were. 

Inspired by what I saw I wanted to replicate the same level of quality in my build. 

When it came to installing the hydraulic lines in the aircraft, I knew I wanted to keep everything sharp and neat looking so I measured the diameter of the hoses and printed up a top/bottom design that can hold the lines to prevent movement keep everything looking sharp. 

Here’s the design in CAD:

Screen Shot 2022-01-28 at 8.53.55.png

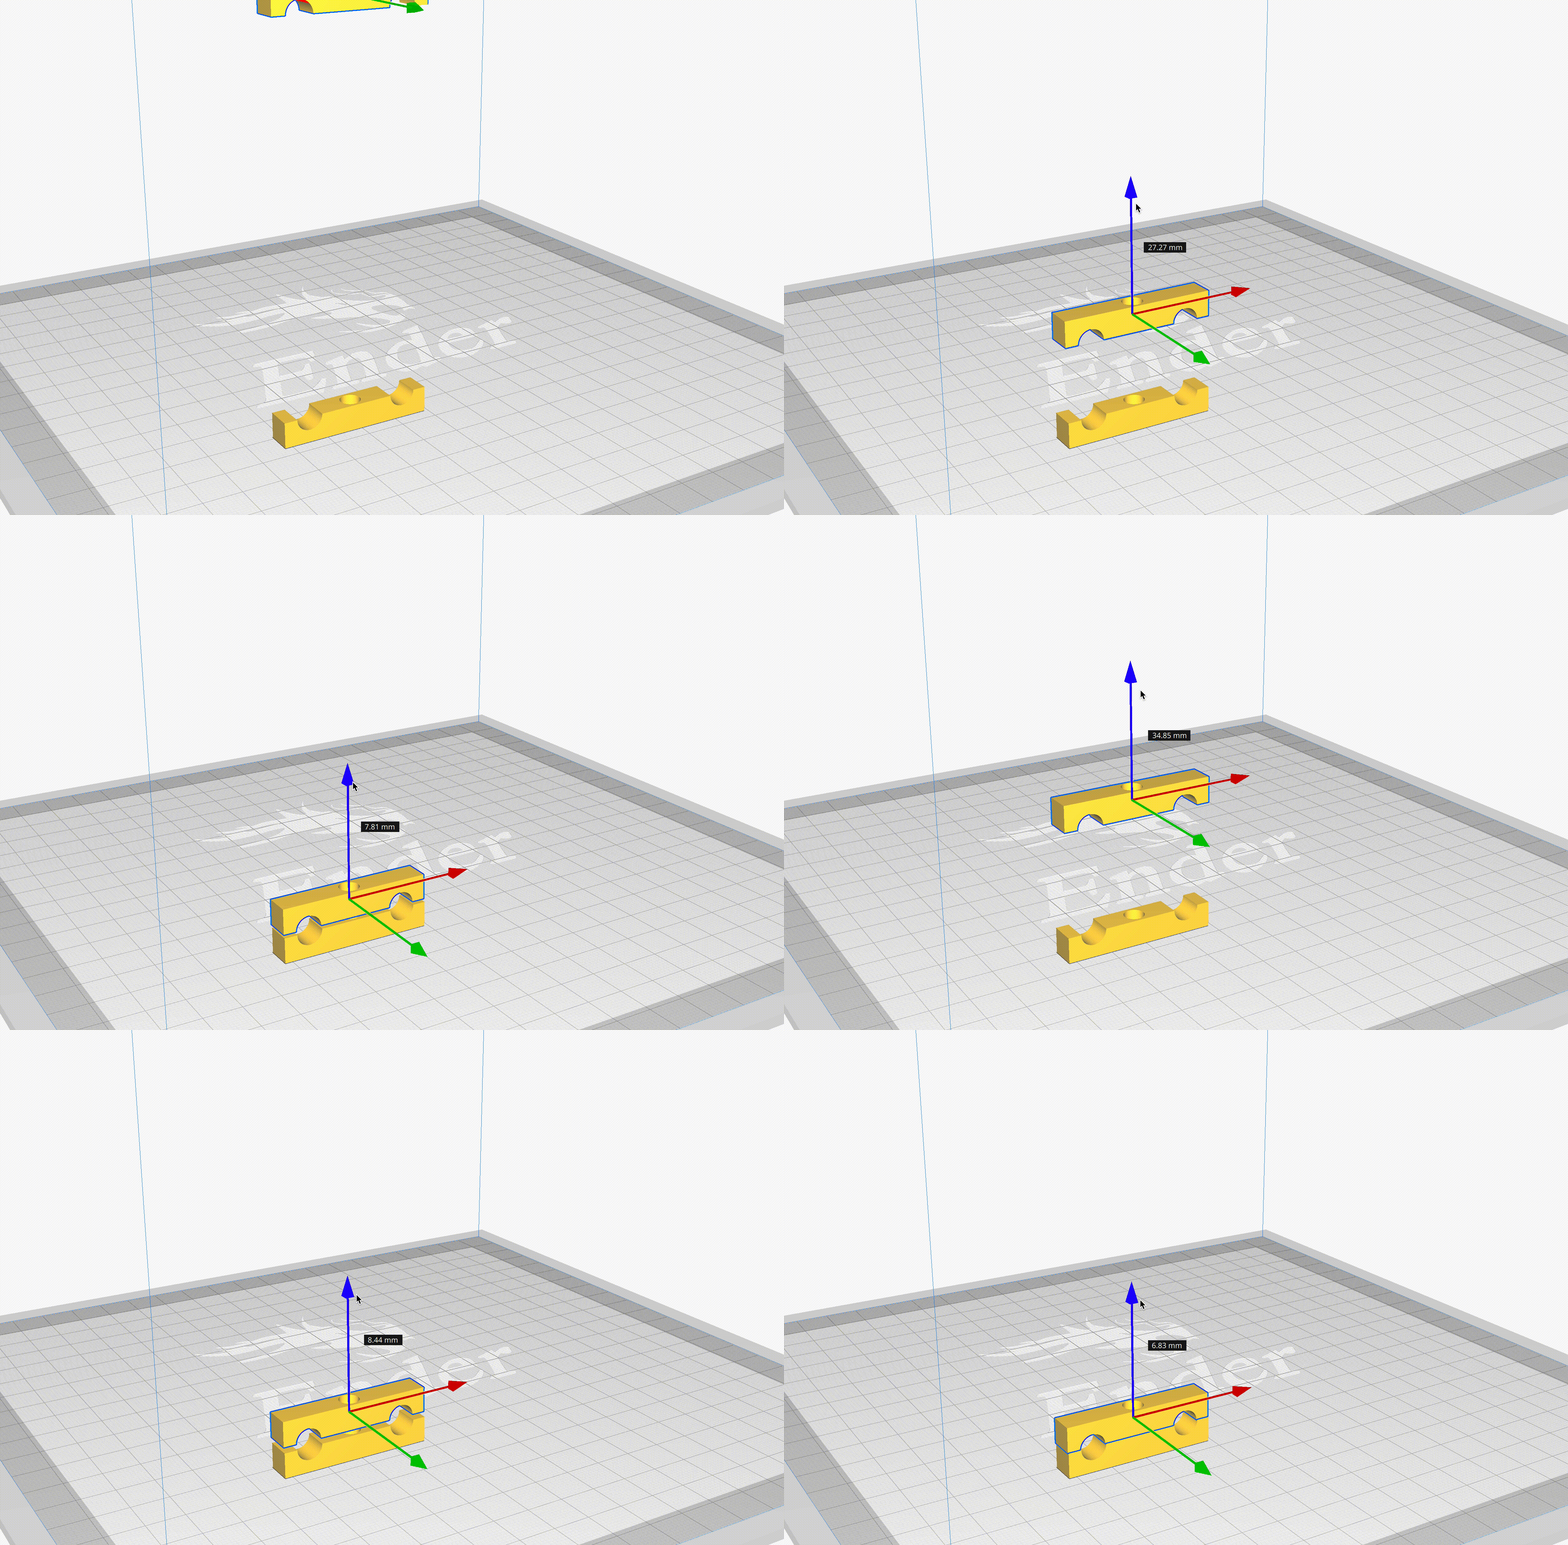
Here is a small clip of the top and bottom mating.

Example parts mating.

Here’s an example of how the parts look when mated.

Here is the holder being used to secure the aluminum hydraulic lines in the forward bulkhead. 

3D Printed Hose Holder

3D Printed Hose Holder

As you can see, it’s a single component you can use for both top and bottom with a hole in the middle for a fastener. 

I’m big on multi use designs and hate having to design something that isn’t easy to use and easy to get going with. 

Not having to worry about if a part is the top or bottom of a component is a big timer saver. 

Thoughts and Conclusions 

The ability to keep the lines looking smart but also out of the way of other components means this was a double win. The hoses are secure and if anyone pops the lid to see what’s inside I hope they would be impressed with how neat everything is. 

As you can buy 3d filament in almost any color these days, its very easy to match the 3d printed parts to either the primary or secondary color of your aircraft so that all the parts match and that it looks like part of the build.

Overall I’m very enthused with the parts I’ve been able to make for the aircraft and I can’t wait to see what else I can design. 

I saw a few peoples projects using 3D printed parts for AC directional vents, which inspired me to see what else could be built with the printer.

If anyone has any parts they would like to see made or have any they want to show me I’d love to see what has been built!

This is part two of my series in building a VFR LED Sectional Map.
You can find part one here

In my last post I talked about how to build the hardware, gluing the sectional map to the picture frame, attaching the LED’s and wiring up the RaspberryPi.

This post focuses on the software component.
There are two parts to the software project here.

1. Getting the weather for the appropriate airports
2. Converting the weather conditions into an LED color and sending to the correct LED.

If you just need the code, GitHub here.

I chose to write this script in Python because of how easy it is to use RPi.GPIO to interface with the GPIO Pins on the RaspberryPi.
As mentioned, Im using a RaspberryPi Zero Wireless, I picked this unit for two reasons;

1. It’s low powered
2. It’s got wifi

In the GitHub repo you will find a Python Script called metarManager.py, this script is used to gather the METAR data and then update the LED’s based on the METAR report.

As each LED is a tricolor LED, I grouped them all together based on Airport and corresponding GPIO pins.
eg: ‘KPDK’:(19,21,23)
Is PDK Airport, with Red Pin 19, Green Pin 21 and Blue Pin 23.

For information on how to turn on/off LED’s using the GPIO, please see this guide.

For the weather API, I found this awesome weather service called avwx.rest, this service reads and returns tons of JSON data on an airport, including weather, runways and altimeter settings. Part of that response object is a value called ‘flight_rules’.

Side note – What are flight rules?
Flight rules are regulations and procedures adopted for flying aircraft in various conditions.
They come in two flavors: VFR and IFR.

Whats VFR?
VFR stands for visual flight rules, and the term refers to a set of rules created by the FAA for flight in VMC, or visual meteorological conditions.
VFR rules cover visibility requirements and cloud clearance criteria required to fly with visual reference to the ground and/or horizon. These visibility and cloud clearance requirements vary depending on the type of airspace you’re flying in, but they exist to ensure that pilots flying VFR don’t get caught up in the clouds and crash into each other.

Whats IFR?
IFR stands for instrument flight rules – the set of rules that govern aircraft that fly in IMC, or instrument meteorological conditions. In general terms, instrument flying means flying in the clouds. More specifically, IMC is defined as weather that is “below the minimums prescribed for flight under Visual Flight Rules.”

It’s called instrument flight because the pilot navigates only by reference to the instruments in the aircraft cockpit. Flying in the clouds (IMC) requires an IFR flight plan and an instrument rating.

In some online services such as skyvector and foreflight they blend maps and visual information to help pilots get an accurate picture of what’s going on in the area.
See example:

ATL Sectional

All Green Means good flying

In these cases, colors are also used to help identify maps and visual information.

Green for VFR rules
Blue for Marginal VFR rules
Red for IFR rules
Purple for Marginal IFR rules (this is usually REALLY bad weather!)

As you can see from the image, Atlanta is in the green today which means it’s a great day to go flying.
By reading the flight rules property from the API, we can quickly pair the appropriate color on the LED.

Using simpleJSON paired with Python’s URL Library I wrote a function that can get METAR data on each airport in my array and return back the flight rules.

def getMetar(airportCode):
url = 'https://avwx.rest/api/metar/'+airportCode+'?format=json'
hdr = { 'Authorization' : apiKey }

try:
metarRequest = urllib.request.Request(url, headers=hdr)
response = urllib.request.urlopen(metarRequest)
metarResponse = response.read().decode('utf-8')
jsonMetar = json.loads(metarResponse)

if jsonMetar['flight_rules'] == 'VFR':
flightRulesObject[airportCode] = 'GREEN'

if jsonMetar['flight_rules'] == 'MVFR':
flightRulesObject[airportCode] = 'BLUE'

if jsonMetar['flight_rules'] == 'IFR':
flightRulesObject[airportCode] = 'RED'

if jsonMetar['flight_rules'] == 'LIFR':
flightRulesObject[airportCode] = 'PURPLE'

# flightRulesObject[airportCode] = jsonMetar['flight_rules']

if len(flightRulesObject) == len(ledPins):
# print(flightRulesObject)
updateLEDsFromMETARs()

except e:
print(e)
flightRulesObject[airportCode] = 'OFF'

You can see here that the function injects the correct airport code into the URL then makes the request.
Once it has its response we add all the data to the flight rules object and call the function to update the LED’s.

Once the colors on the LED’s are updated, I sleep the unit for 55 mins then run a cron job to reopen the script again on the hour, as METAR information is updated hourly this will keep the LED’s up to date with the latest weather.

You can find part two of this series here.

VFR Sectional LED Map

In the years I’ve been learning to fly a plane, two things always come up;

1. Whats the METAR (weather)
2. How does it effect the VFR Sectional (map)

Learning to read both the weather and maps for flying is an essential part of learning to fly a plane.

1. You need to know where you are going
2. You need to make sure you don’t fly into a thunderstorm…

Once I started to accumulate a few maps, I thought I would make good use of them by creating a fun, fast and visually appealing way to read the weather at a few airports around my local area.


Finding some very fancy (and cheap) frames from Michaels, I cut out and glued the sectional to the backboard and then drilled out the holes for the airports I wanted to light up.

For this project I decided to go for 5 Tri-Color LED’s, these were all wired up with the common pin to ground and the Red, Green and Blue LED’s to the RaspberryPi GPIO Pins.

Whats needed for this project
To get started on this project you are going to need:
1. VFR Sectional Map of the area you want
2. Picture Frame
3. RaspberryPi, I chose to use a RaspberryPi Zero Wireless here
4. Tri-Color LED’s
5. Some wires and some hot glue.

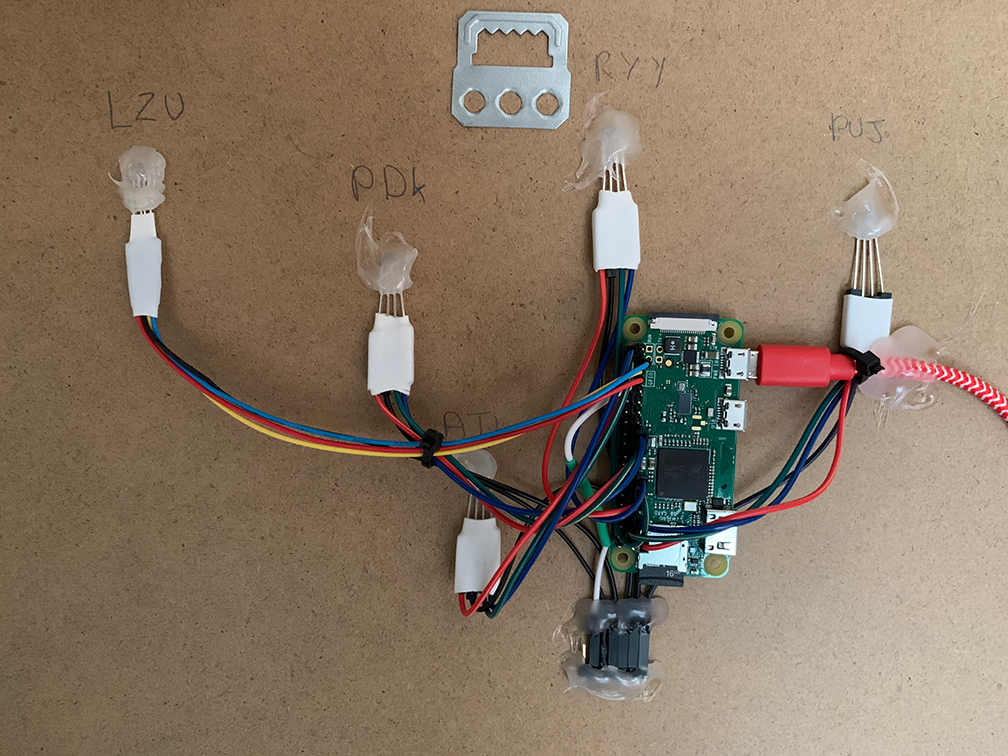
First off, identify what airports you want to get information on, then measure and cut your wires.. Tragically I failed to do this (so learn from my mistake) and so you can see from the pictures that some of the wires are a lot tighter than they should really be.

*Pro Tip*
I highly recommend getting a 90 Degree header for the RaspberryPi, that way your wires and pins will be more flush with the picture frame rather than sticking out. If I were to do this project again, hands down I would grab some from eBay or Amazon.

Once you have your map and are happy with what airports you want to light up, go ahead and cut the rest of the map away and glue the paper to the backboard.
I used PVA glue, but really any glue suitable for paper will be great here.

With the glue dry I then attached the LED’s, RaspberryPi and USB Power cable.
VFR Pi and Wires

VFR Pi

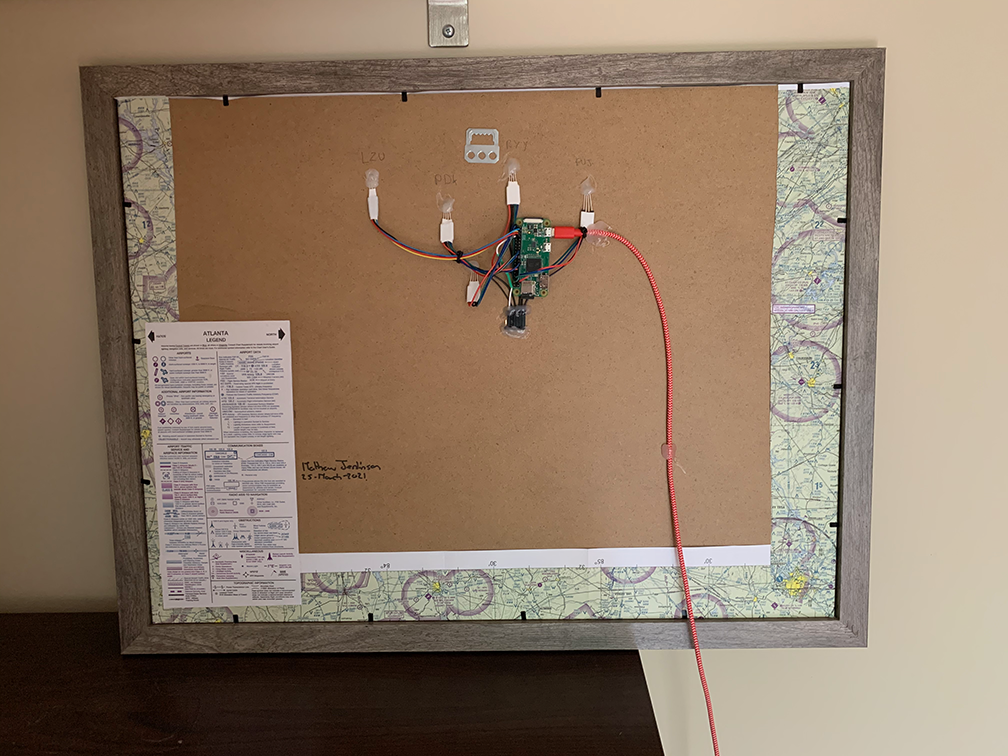
At this point the hardware is done and it looks like this:
VFR Sectional Front

Time to move onto the software! You can find part two of this post here

This guide focus is on installing open-vm-tools on Ubuntu based OS’s.

During the downtime of Christmas 2020, I wanted take some time to focus on some new and exciting changes in the virtual hosting world.
Namely the adoption of VMWare’s ESXI port onto the ARM architecture and the now ability to install VMWare ESXI 7.0 onto a RaspberryPi!

I won’t go into all the details on this port, but the crucks of it are around power and flexibility. With the port to ARM based processors, you can run ESXI on some beast processors such as ‘Ampere Altra Q80-33 80-core Arm CPU‘ but also on a home lab using a RaspberryPi4 with 8GB of Ram.

There are a number of guides to help you get setup with ESXI on your RaspberryPi, my favorite being this YouTube video by NetworkChuck.

Once you have a working VM one of the next jobs to do is to install the VMware Tools that link the virtual machine to the ESXI Host.
Normally you would just run command

sudo apt-get install open-vm-tools

However if you have stumbled upon this page, it likely means you have ended up seeing error:

Reading package lists... Done
Building dependency tree
Reading state information... Done
Package open-vm-tools is not available, but is referred to by another package.
This may mean that the package is missing, has been obsoleted, or
is only available from another source

Which looks like this in a terminal window:

VM Install Error

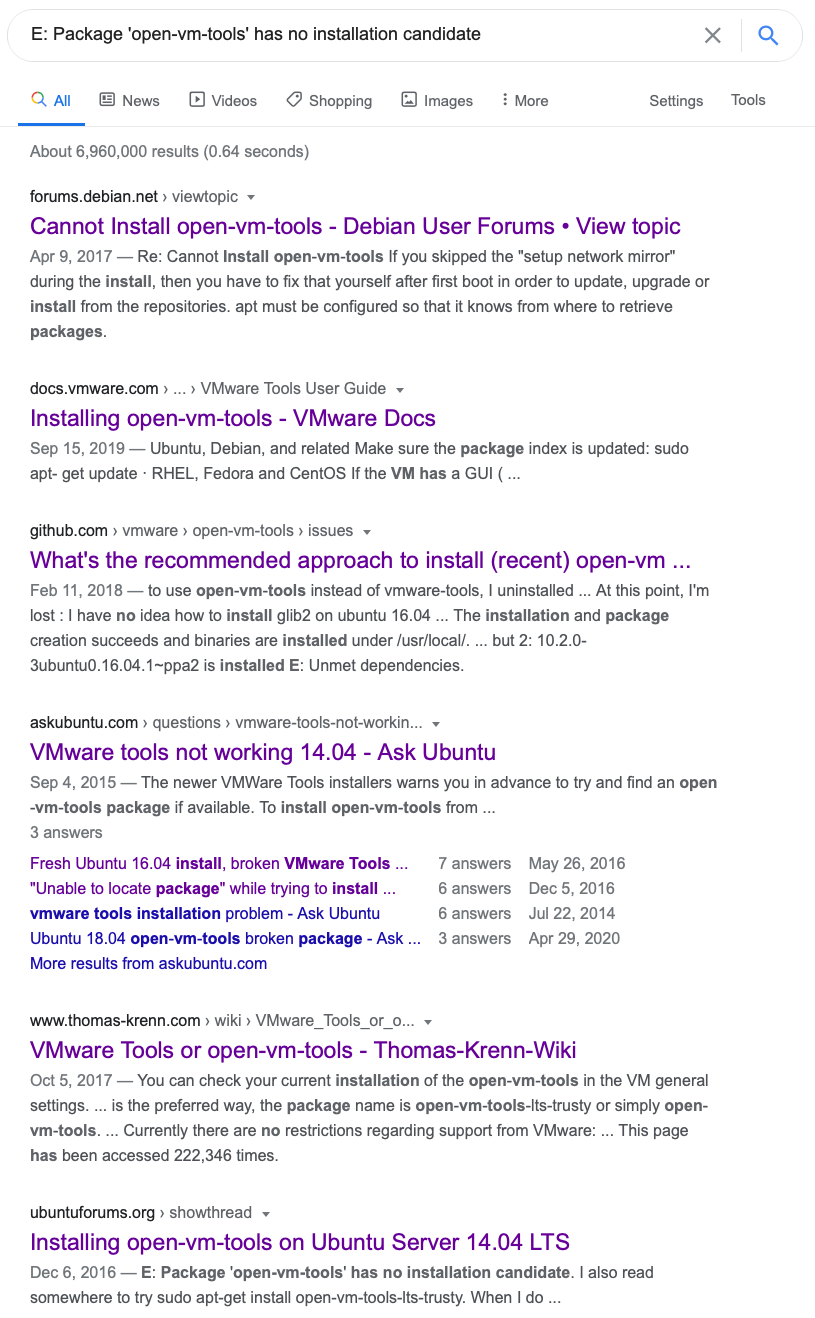
Wamp Wamp. After a long peruse of the worlds favorite search engine:

Google History

Google History

I found nothing that would help.

But! I did find the git repo to VM’s tools. GitHub VM Repo.

So here is the Jan 4th 2021 Guide to installing VMware Tools onto Ubuntu ARM OS’s that are hosted on a RaspberryPi ESXI Host.

  • ssh into your virtual machine, if your setup is anything like mine it will be:ssh [email protected]

    Once you provide a password and are at the terminal, issue the following command

    sudo apt install -y git automake make gobjc++ libtool pkg-config libmspack-dev libglib2.0-dev libpam0g-dev libssl-dev libxml2-dev libxmlsec1-dev libx11-dev libxext-dev libxinerama-dev libxi-dev libxrender-dev libxrandr-dev libxtst-dev libgdk-pixbuf2.0-dev libgtk-3-dev libgtkmm-3.0-dev

This will install any needed toolchains and compilers.

Then if you aren’t already at your /home directory, run command
cd ~
This will take you home and give us a location to clone the VM tools directory to.

Now, lets grab the VM Tools from the above repo.

git clone https://github.com/vmware/open-vm-tools.git

Once downloaded, lets jump into the main directory and start to set things up.

cd open-vm-tools/open-vm-tools/

First thing we need to do is run the config on the dir, then issue the make and make install commands.
Its important to run these as either root or sudo, you can do this by either running command sudo su or adding sudo to each line.

sudo su
autoreconf -i
./configure --disable-dependency-tracking
make
make install
ldconfig

Next we need to make a vmtoolsd.service file, using your favorite text editor (Go Nano!) create a file called vmtoolsd.service in directory: /etc/systemd/system/

you will need to run this as a sudo or admin user: sudo nano /etc/systemd/system/vmtoolsd.service

In the file, copy and paste the following:

[Unit]
Description=Service for virtual machines hosted on VMware
Documentation=http://github.com/vmware/open-vm-tools
After=network-online.target

[Service]
ExecStart=/usr/local/bin/vmtoolsd
Restart=always
TimeoutStopSec=5

[Install]
WantedBy=multi-user.target

Save and exit the file and then issue the following commands:

sudo systemctl enable vmtoolsd.service
sudo systemctl start vmtoolsd.service

Boom! You can now verify that your VM has the tools installed by doing a quick command:

sudo systemctl status vmtoolsd.service

But you can now also go to the VM UI window and the ESXI host will tell you if the service is working and has connected successfully.
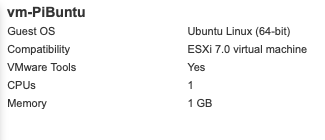
VM Tools Installed

For those that just want a super fast and efficient copy and paste into your CLI, the following is what you need:

  • sudo apt install -y git automake make gobjc++ libtool pkg-config libmspack-dev libglib2.0-dev libpam0g-dev libssl-dev libxml2-dev libxmlsec1-dev libx11-dev libxext-dev libxinerama-dev libxi-dev libxrender-dev libxrandr-dev libxtst-dev libgdk-pixbuf2.0-dev libgtk-3-dev libgtkmm-3.0-dev && cd ~ && sudo git clone https://github.com/vmware/open-vm-tools.git && cd open-vm-tools/open-vm-tools/ && sudo autoreconf -i && sudo ./configure --disable-dependency-tracking && sudo make && sudo make install && sudo ldconfig
  • then:

  • sudo nano /etc/systemd/system/vmtoolsd.service
  • copy and paste:

    [Unit]
    Description=Service for virtual machines hosted on VMware
    Documentation=http://github.com/vmware/open-vm-tools
    After=network-online.target

    [Service]
    ExecStart=/usr/local/bin/vmtoolsd
    Restart=always
    TimeoutStopSec=5

    [Install]
    WantedBy=multi-user.target

    then:

  • sudo systemctl enable vmtoolsd.service && sudo systemctl start vmtoolsd.service
  • Unused number hunter is Pyton based script to help you release (and save some $$$’s) on unused numbers that may be sitting in your Twilio account.
    If you are in the habbit of buying Twlio numbers, using them for a project and then not relasing them this script will be the tool for you.

    How to use:

    • Download the python script to a directory
    • Ensure you have the Twilio Python helper library installed, you can find this at: https://github.com/twilio/twilio-python
    • Edit the Accountsid, Authkey and number of call records you want to examine, saving the script.
    • Run: python /directory/NumberHunter.py

    What will happen:

    • NumberHunter will grab all the phone numbers from your Twilio account, storing the numbers in a txt file called: TwilioNumbersInAccount.txt
    • NumberHunter will grab a copy of the call records up to the number (default is 100) you want to examine. (Saved in TwilioCallLog.txt)
    • NumberHunter will compare numbers in your call log against your Twilio numbers
    • NumberHunter will save a copy of your unused numbers in a file called unusedTwilioNumbers.txt
    • NumberHunter will ask you if you want to release these numbers – If you select Y it WILL REMOVE these numbers from your account immediately.

    GitHub link: https://github.com/dotmat/TwilioPythonUnusedNumberHunter
    Happy Hunting!

    TL:DR : Python based script to search your account for unused numbers and release them.

    In my last post: http://www.mathewjenkinson.co.uk/twilio-sms-conversations-using-cookies/ I used HTTP Cookies to ask multiple questions to a handset. This got me thinking, what if I could use that conversation to generate a lead in Salesforce.

    For example, your at an event, ‘CloudForce’ for example 😉 and you want to ask your guests about the experience they are having as well as capture the guests phone number in a lead campaign in Salesforce ready to pick up with the lead after the event. This gives you instant feedback on how people are enjoying the event, an incoming lead stream and verified phone numbers from potential customers.

    In this post, Im going to build on using Twilio cookies to populate a lead campaign in Salesforce. To initiate this setup, I want to get the interested lead to message a keyword “CloudForceEU” for example. Once the initial message comes in, I want to ask 4 questions to the lead and then pass the captured data to our Salesforce instance.

    To replicate this setup you will need:

    • An account with Twilio (https://www.twilio.com/try-twilio)
    • A SMS capable number within your Account Portal.
    • A Salesforce instance where you can add custom lead fields and use Web2Lead Form generator
    • A PHP based server to host the script found on my Github.  – If your savy you can make your own in another language such as Ruby or Python 🙂

    Setting up Salesforce

    To begin we need to add 4 custom fields to our salesforce lead’s panel. As I am choosing to ask 4 questions to our potential lead I want to capture this information so I can get an overall feel for the event as well as capturing info about our potential lead.

    To add a custom field in Salesforce go to : salesforce.com/p/setup/layout/LayoutFieldList?type=Lead&setupid=LeadFields

    or:  Setup > Leads > Fields and scroll to the bottom for ‘Custom Fields’ It should look something like:

    Leads Generation SalesForce

    Leads Generation SalesForce

    Here we want the button marked ‘New’. Following the steps, we want a new text box of no more than 150 (This is WAY more than we need as we are only gathering simple responses). Fill in the details for the new field and then continue along. I tend to add the details of the question in the description so that I know what Question1 relates to. Continue this until you have all your question fields added.

    Now we are going to build our Web2Lead form and capture the ID’s needed for our SMS Script.

    Navigate to: Customize > Leads > Web-To-Lead

    Remove all the initial fields from the box marked ‘Selected Fields’ and then import:

    • PhoneNumber
    • Campaign
    • Question1
    • Question2
    • Question3
    • Question4

    You could add first name to this setup but you would need add a name collection to the SMS conversation, while its easy to do. Its not something I will be doing in this setup.

    In the end your setup should look something like:

    SF Web2Lead

    SF Web2Lead

    Then click generate. Salesforce will spit you out some code that you could use in a webform but we are going to grab the details of this code and use it in our SMS lead tracker. The code will look something like:


    <!– ———————————————————————- –>
    <!– NOTE: Please add the following <META> element to your page <HEAD>. –>
    <!– If necessary, please modify the charset parameter to specify the –>
    <!– character set of your HTML page. –>
    <!– ———————————————————————- –>

    <META HTTP-EQUIV=”Content-type” CONTENT=”text/html; charset=UTF-8″>

    <!– ———————————————————————- –>
    <!– NOTE: Please add the following <FORM> element to your page. –>
    <!– ———————————————————————- –>

    <form action=”https://www.salesforce.com/servlet/servlet.WebToLead?encoding=UTF-8″ method=”POST”>

    <input type=hidden name=”oid” value=”ABC123″>
    <input type=hidden name=”retURL” value=”http://”>

    <!– ———————————————————————- –>
    <!– NOTE: These fields are optional debugging elements. Please uncomment –>
    <!– these lines if you wish to test in debug mode. –>
    <!– <input type=”hidden” name=”debug” value=1> –>
    <!– <input type=”hidden” name=”debugEmail” –>
    <!– value=”[email protected]”> –>
    <!– ———————————————————————- –>

    <label for=”phone”>Phone</label><input id=”phone” maxlength=”40″ name=”phone” size=”20″ type=”text” /><br>

    <label for=”Campaign_ID”>Campaign</label><select id=”Campaign_ID” name=”Campaign_ID”><option value=””>–None–</option></select><br>

    Question1:<input id=”Question1″ maxlength=”174″ name=”Question1″ size=”20″ type=”text” /><br>

    Question2:<input id=”Question2″ maxlength=”174″ name=”Question2″ size=”20″ type=”text” /><br>

    Question3:<input id=”Question3″ maxlength=”174″ name=”Question3″ size=”20″ type=”text” /><br>

    Question4:<input id=”Question4″ maxlength=”174″ name=”Question4″ size=”20″ type=”text” /><br>

    <input type=”submit” name=”submit”>

    </form>


    As you can see its quite comprehensive, what we need from this code snippet; is the form URL, formID and then the ID’s for our phone number, campaign and questions. From the script above we get

    • URL Endpoint: ‘https://www.salesforce.com/servlet/servlet.WebToLead?encoding=UTF-8’
    • FormID: ‘ABC123’
    • Phone Number: ‘phone’
    • Campaign ID : ‘Campaign_ID’
    • Question 1 : ‘Question1’
    • Question 2 : ‘Question2’
    • Question 3 : ‘Question3’
    • Question 4 : ‘Question4’

    This is the data we need to plug into our SMS cookie script.

    At the end of the Twilio SMS conversation, the script will bundle up the details of the conversation and HTTPS POST to the salesforce URL.

    Using Twilio cookies to mange the SMS Conversation

    In the last post: http://www.mathewjenkinson.co.uk/twilio-sms-conversations-using-cookies/ I used HTTP Cookies to ask multiple questions to a handset. Now we are going to do the same thing, except at the end of this conversation we are going to post the data to Salesforce. You can find a copy of the script on my Github Twilio 2 SalesforceLeads.

    The full script Im going to use is:

    <?php
    // Load the questions we want:
    $question1 = ‘Hello. Welcome to the event! We would like to ask you some questions about your experience.</Message><Message>What did you think of the venue & refreshments? 5 (Exceptional) 0 (Poor)’; // by adding the </Message><Message> you can break up the initial response into a welcome message and then question1.
    $question2 = ‘And the content of the Presentations? 5 (Exceptional) 0 (Poor)’;
    $question3 = ‘How likely are you to attend future Twilio events from 5 (Definitely would) to 0 (definitely would not)’;
    $question4 = ‘Is there anything specific you would like to discuss with Twilio? 5 (Yes, please asks someone to call) 0 (I’ll contact you if I need anything)’;
    // After we have all 4 questions we can upload to the DB and thank the user for their input
    $endStatement = ‘Thanks for your time. Hope you have a fun day!’;

    // If we have no cookies we need to set all the cookies to nil and ask the opening question.
    if(!isset($_COOKIE[‘question1’])) {
    $TwiMLResponse = $question1;
    //setcookie(‘question1’, ‘nil’);
    setcookie(‘event’, $_POST[‘Body’]);
    setcookie(‘question1’, ‘nil’);
    setcookie(‘question2’, ‘nil’);
    setcookie(‘question3’, ‘nil’);
    setcookie(‘question4’, ‘nil’);
    }
    // If Question 1 is blank we can pair the answer to question 1
    elseif ($_COOKIE[‘question1’] == ‘nil’) {
    setcookie(‘question1’, $_POST[‘Body’]);
    $TwiMLResponse = $question2;
    }
    // If Question 1 is not blank we find out if question 2 is blank and move up the ladder
    elseif (($_COOKIE[‘question2’] == ‘nil’)) {
    setcookie(‘question2’, $_POST[‘Body’]);
    $TwiMLResponse = $question3;
    }
    elseif (($_COOKIE[‘question3’] == ‘nil’)) {
    setcookie(‘question3’, $_POST[‘Body’]);
    $TwiMLResponse = $question4;
    }
    // After we get the response for question 4, we can assign it to the question.
    // Now we have all 4 questions answered and can pass the thank you note and also make a HTTP POST to our end point
    elseif (($_COOKIE[‘question4’] == ‘nil’)) {
    // With the last question answered, we can reply with our end statement and POST all the data from the conversation.
    $TwiMLResponse = $endStatement;
    // So now we have the cookies for the event and questions 1 to 3 and the BODY tag for answer 4. Now we can make a POST request to our form with that data.

    // Get cURL resource
    $curl = curl_init();
    // Set some options – we are passing in a useragent too here
    curl_setopt_array($curl, array(
    CURLOPT_RETURNTRANSFER => 1,
    CURLOPT_URL => ‘https://www.salesforce.com/servlet/servlet.WebToLead?encoding=UTF-8’,
    CURLOPT_USERAGENT => ‘TwilioSMS’,
    CURLOPT_POST => 1,
    // POST fields for salesforce input:
    CURLOPT_POSTFIELDS => array(‘oid’ => ‘ABC123’, ‘phone’ => $_POST[‘From’], ‘Campaign_ID’ => $_COOKIE[‘event’], ‘Question1’ => $_COOKIE[‘question1’], ‘Question2’ => $_COOKIE[‘question2’], ‘Question3’ => $_COOKIE[‘question3’], ‘Question4’ => $_POST[‘Body’])

    ));
    // Send the request & save response to $resp
    $resp = curl_exec($curl);
    // Close request to clear up some resources
    curl_close($curl);
    }
    header(‘content-type: text/xml’);
    ?>
    <Response><Message><?php echo $TwiMLResponse; ?></Message></Response>

    As you can see Im only use one script to manage the conversation, updating the cookies and working out where the data needs to be updated to and eventually POSTed too. As we are capturing questions about our SalesForceEU event Im going to need 4 questions:

    $question1 = ‘Hello. Welcome to the event! We would like to ask you some questions about your experience.</Message><Message>What did you think of the venue & refreshments? 5 (Exceptional) 0 (Poor)’; // by adding the </Message><Message> you can break up the initial response into a welcome message and then question1.
    $question2 = ‘And the content of the Presentations? 5 (Exceptional) 0 (Poor)’;
    $question3 = ‘How likely are you to attend future Twilio events from 5 (Definitely would) to 0 (definitely would not)’;
    $question4 = ‘Is there anything specific you would like to discuss with Twilio? 5 (Yes, please asks someone to call) 0 (I’ll contact you if I need anything)’;

    As the script gets more replies from Twilio it populates the questions cookies until they are all full of data. Then we thank the user for their time, assemble the POST request and send it off to SalesForce.

    CURLOPT_RETURNTRANSFER => 1,
    CURLOPT_URL => ‘https://www.salesforce.com/servlet/servlet.WebToLead?encoding=UTF-8’,
    CURLOPT_USERAGENT => ‘TwilioSMS’,
    CURLOPT_POST => 1,
    // POST fields for salesforce input:
    CURLOPT_POSTFIELDS => array(‘oid’ => ‘ABC123’, ‘phone’ => $_POST[‘From’], ‘Campaign_ID’ => $_COOKIE[‘event’], ‘Question1’ => $_COOKIE[‘question1’], ‘Question2’ => $_COOKIE[‘question2’], ‘Question3’ => $_COOKIE[‘question3’], ‘Question4’ => $_POST[‘Body’])

    If we run a test between my phone and Salesforce we get:

    Twilio2SalesForceSMS

    Twilio2SalesForceSMS


    and in SalesForce:

    SalesForce Leed Capture from SMS

    SalesForce Leed Capture from SMS


    As you can see this opens up lots of possibilities of lead capture and accurate number sourcing from events. You can even have a campaign manager back at HQ reaching back out to leads while they are still at the event.


    Working in support, I field a lot of queries from small business managers and startups about how to setup and build a phone menu system (IVR).

    Interactive Voice Response (IVR) adds a level of class to your small business setup, they can make your organisation look bigger than it is and allows you to directly manage the routing of calls made to your company.

    One of the best features of a Twilio based IVR is that you can give your customers one phone number and then route the calls to your sales / technicians / whoever as you need to.

    –       No more ring this number for sales, ring this number for support etc.…

    Lets propose we need to make an IVR for ‘John Smith Widget Company’, this IVR needs to have two menu options; one for sales and one for support and greet the caller with the office hours: 8am to 6pm


    – When the caller selects an option (Sales or Support) we want to be able to route this call to an appropriate phone number (the companies sales manger for example), when this person (sales manager) answers the phone we want to be able to whisper that this is a sales call and offer them a chance to accept or reject the call.


    – Should no one answer the phone or the call be rejected, as a fall back we need to explain to the caller no one is around and to leave a message on our voicemail system.

    For this we will need:

    A Twilio Account

    A Twilio phone number

    A webserver that supports a scripting language, I’m using PHP here but the code and logic will translate across most other languages.

    If you haven’t done so already, sign up at https://www.twilio.com/try-twilio

    You will need to verify your phone number and once in, copy your phone number, Accountsid and Authkey from your account portal page.

    Download the Twilio PHP Libaray from github, the URL is:

    URL

    Make a new directory, something called smbivr and copy the ‘Services’ into this directory.

    Now we need a landing page for when someone calls your Twilio number.

    Make a new file called twilioIncomingCallHandler.php and save it in your directory smbivr

    In this file we are going to add:

    <?php

    // Phone Number for your Sales Line:

    $salesNumber = “”;

    // Phone Number for your Support line:

    $supportNumber = “”;

    // To set the Caller ID to be the actual caller, uncomment this:

    //$callerID = $_GET[“From”];

    // To set the CallerID to the number dialed IE your Sales Line uncomment this:

    $callerID = $_GET[“To”];

    // Check if the HTTP request is loop by checking for any pressed digits

    $menuInput = $_GET[“Digits”];

    // If the menu is 1 we know they want sales team so we are going to say

    // ‘Transfering you to sales now, Please note call calls are recoreded for training purposes’

    // Then we are going to call the sales line and whisper the details of the call as well as giving the agent to divert to VM.

    // If the menu is 2 the call is for support, so are going to transfer the call to out support line and whisper that the call is about customer support.

    // If the menu is blank its a 1st time caller so we great the caller and then present the landing menu.

    if ($menuInput == “1”) {

    $TwiMLResponse = “<Dial callerId=\””. $callerID . “\” timeout=\”18\” action=\”./handleDialCallStatus.php\”><Number url=\”./whisper.php?type=sales\”>$salesNumber</Number></Dial>”;

    }

    elseif ($menuInput == “2”) {

    $TwiMLResponse = “<Dial callerId=\””. $callerID . “\” timeout=\”18\” action=\”./handleDialCallStatus.php\”><Number url=\”./whisper.php?type=support\”>$supportNumber</Number></Dial>”;

    }

    else {

    $TwiMLResponse = “<Gather method=\”GET\” timeout=\”25\” numDigits=\”1\”><Say voice=\”alice\”>Hello and welcome to Chicken and Bee. Your partner for web, voice and messaging services. Our opening hours are 8 am to 6 PM London Time. For Sales please press 1. For support or other enquiries please press 2.</Say></Gather>”;

    }

    header(“content-type: text/xml”);

    ?>

    <Response><?php echo $TwiMLResponse; ?></Response>

    As you can see from the code this file is going to do two things, the first time its called it will greet the caller with our welcome message, opening hours and then ask the caller who they would like to be directed too, when the user inputs a digit Twilio will make a HTTP POST to the same file but this time including the digit the caller pressed.

    Now when the code runs, it will look for any digits pressed and provide a different set of TwiML instructions – in this case call either the sales or support line.

    This is the normal for a IVR system, but we are going to branch off now and do some advanced bits.

    For example what if the caller is a known customer or a high value customer, it might be a good idea for us to gather this callerID and check our CRM to see if they are in fact a customer.

    When we made the <Dial> verb we also included some attributes, these included:

    Action=”./handleDialCallStatus.php

    and

    url=”./whisper.php

    You can find more information on these verbs at:

    https://www.twilio.com/docs/api/twiml/dial#attributes-action

    and

    https://www.twilio.com/docs/api/twiml/number#attributes-url

    The action URL (handleDialCallStatus.php) will handle the call when the dialed party has provided a response – hangup, voicemail etc.

    The URL (whisper.php) will speak to the dialed party and give them an option to accept or decline the call based on some TwiML and scripting.

    To make the ‘Number URL’ speak to the dialed party we direct the URL to a new script called ‘whisper.php’

    In this file we are going to place:

    <?php

    // Find out what kind of whisper we are going to do is this a sales or support call?

    $callType = $_GET[“type”];

    // If the Type is a sales call say to the agent that this is a sales call and give them an option to divert to voicemail or accept the call.

    if ($callType == “sales”) {

    $TwiMLResponse = “<Gather action=\”./agentResponse.php\” numDigits=\”1\”><Say>You have an incoming sales call.</Say><Say>To accept the call, press 1.</Say><Say>To reject the call, press 2.</Say></Gather><Say>Sorry, I didn’t get your response.</Say><Redirect>screen-caller.xml</Redirect>”;

    }

    // If this is a support call say to the agent that this is a support call and give them an option to divert to VM or accept the call

    if ($callType == “support”) {

    $TwiMLResponse = “<Gather action=\”./agentResponse.php\” numDigits=\”1\”><Say>You have an incoming support call.</Say><Say>To accept the call, press 1.</Say><Say>To reject the call, press 2.</Say></Gather><Say>Sorry, I didn’t get your response.</Say><Redirect>screen-caller.xml</Redirect>”;

    }

    header(“content-type: text/xml”);

    ?>

    <Response><?php echo $TwiMLResponse; ?></Response>

    As you can see from the code, we are passing the type of call: Sales or Support as a variable to this TwiML.

    You could if you had a CRM such as Salesforce or vTiger make an API call to the database, querying if the callerID is a known customer and if so pass back details to be relayed to the dialed party – How fantastic would it be to have your CRM provide your agent with the call details before they even connect with the customer.

    However, in this example we are going to pass just the message that someone has called the sales or support line and would they like to accept or decline the call.

    If the user presses 1, then the call connects both parties together, if the user presses 2 the call is hung up and the original caller is presented with a ‘I’m sorry, no one is available’ – This is where the Dial Action URL comes in to play.

    Create a new PHP file called handleDialCallStatus.php

    In this file place:

    <?php

    // If the call is due to be hung up be cause the whisper hung up, then we want to redirect the call to Voicemail and capture the Voicemail

    $whisperStatus = $_POST[“DialCallStatus”];

    if ($whisperStatus == “busy” or “no-answer” or “failed”) {

    $TwiMLResponse = “<Say voice=\”alice\”>I am sorry. No one is around at the moment to take your call. Please leave your name and number and someone will get back to you shortly. Thank you!</Say><Record action=\”./handleRecording.php\” maxLength=\”60\” finishOnKey=\”*\” /><Say>I did not receive a recording</Say>”;

    }

    else

    {

    $TwiMLResponse = “<Hangup/>”;

    }

    header(“content-type: text/xml”);

    ?>

    <Response><?php echo $TwiMLResponse; ?></Response>

    This file will work out what happened with our called party. Did they hang up, was the line busy or did the call fail for some reason.

    In the event that the any of these three events happen (Reject call, no answer or line busy) we can apologize to the caller and ask them to leave a voicemail.

    In this file you can see that we are calling the Record verb, for more information on this please see:

    INFO ABOUT RECORD VERB

    Inside the record verb we are going to reference handleRecording.php  which is going to be the file responsible for generating the email we are going to send once the recording has been completed.

    Our final file:  handleRecording.php is the file responsible for picking up the URL of the voicemail file and then do something with it. In this case its going to email me a copy of the recording. However you could put this URL (or file) in to a database or some kind of messaging alert.

    The code is:

    <?php

    // Define Email Address and Name

    $eMailAddress = “[email protected]”;

    $emailName = “YourName”;

    $phoneLineName = “Sales HotLine”; // The Name of the phone line called EG is this your Sales Hotline

    // Get the details of the call and recording

    $recordingURL = $_POST[“RecordingUrl”];

    $fromCallerID = $_POST[“From”];

    // Get the Time

    $humanTime = date(‘H:i d/F’, time());

    // Assemble the headers

    $headers = “From: Voicemail<[email protected]>\r\n”; //Your Voicemail email address

    $headers .= “MIME-Version: 1.0\r\n”;

    $headers .= “Content-Type: text/html; charset=ISO-8859-1\r\n”;

    // Assemble the MessageBody.

    $eMailBody = “Hi $emailName,<br /><br />”;

    $eMailBody .= “The $phoneLineName was Called today at: $humanTime<br />”;

    $eMailBody .= “The Caller ID was: $fromCallerID<br />”;

    $eMailBody .= “The Voicemail is: <br /><br /><audio controls><source src=\”” . $recordingURL. “\”></audio><br /><br />”;

    $eMailBody .= “<a href=\”$recordingURL\”>Click here To listen</a><br />”;

    $eMailBody .= “Thanks!<br /><br />Voicemail!”;

    // Assemble the Mail message

    // mail(to,subject,message,headers,parameters);

    mail($eMailAddress, “New Voicemail for $phoneLineName”, $eMailBody, $headers);

    header(“content-type: text/xml”);

    ?>

    <Response></Response>

    You will need to amend all the bits of this file to fit your network / mail server, including FROM email address, TO email address, your name.

    Once you have this setup your good to go!

    Now when someone calls your Twilio number:

    twilioIncomingCallHander.php will pick up the file, greet the caller and ask them where to direct the call.

    When the user selects an option the caller will be played ‘ringing’ sound while Twilio rings the provided number, informs them that a caller is on the line and gives them an option to accept or reject the call.

    If the person answering the call accepts the call, we connect both parties together.

    If the person answering rejects the call or the call cant be connected, we divert the caller to an answer machine, take a message and then email the message to  an email address.

    With this IVR you can add routes and direct calls between your departments quickly and easily.
    Following on my expansion into telephony posts (See a previous one, on making FreePBX work with Twilio). A lot of people have been asking me to provide more information on how to make your phone say things or play and MP3 file.  In particular while in a conference room…

    Lets break this down into two parts; Making ‘Say or Play Bots’ and then adding our ‘Say or Play Bot’ to a conference and doing something.

    Making a ‘Say or Play Bot’

    Using Twilio there are lots of ways to make an automated voice say something to a caller / listener;

    Twimlet Message (https://www.twilio.com/labs/twimlets/message) Static Message or MP3 file
    TwimelBin (http://twimlbin.com) Static Message
    Static XML hosted on your webserver Static Message
    Dynamic web script that generates custom Say XML hosted on your webserver Dynamic Message
    Dynamic web script that plays a custom message pending some criteria Dynamic Message

    Twimlet Message:

    In this example we are going to use a Twimlet message to say “Hi, This is you’re 9 AM Meeting Reminder, The current time is 8.55 AM. You have a meeting with Bob in 5 minutes.”

    The message could be anything, in this case I’ve choose to use a meeting reminder message. If you follow the URL: https://www.twilio.com/labs/twimlets/message You can input your message into the Twimlet generator and it will spit out the URL you need to use with Twilio to get your message spoken:

    http://twimlets.com/message?Message%5B0%5D=Hi%2C%20This%20is%20you’re%209%20AM%20Meeting%20Reminder%2C%20The%20current%20time%20is%208.55%20AM.%20You%20have%20a%20meeting%20with%20Bob%20in%205%20minutes.&

    As you can see our message has now been encoded into a URL form, the spaces between words have been filled in with %20 if we were to buy a phone number now and use this in the Voice URL we would hear this message.

    Twimelbin:

    Twimelbin is an external tool that you can use to test writing your TwiML (XML) writing skills.  It will validate your TwiML and ensure that the syntax is correct, you can then use the URL link provided to reference this TwiML in your Twilio account.  In this example I’m going to copy and paste my TwiML here so you can see what the structure looks like:

    <?xml version=”1.0″ encoding=”UTF-8″?>
    <Response>
    <Say>Hi Caller.</Say>
    <Say>I’m just in the shower at the moment</Say>
    <Say>Please let me wash my hair in peace and I will call you back later today</Say>
    <Say>Thanks!</Say>
    </Response>

    Here you can see I have linked lots of ‘Say’ commands together in one response. We could if we wanted to be annoying (if!) get each command to be spoken in a different voice or even language (https://www.twilio.com/docs/api/twiml/say) but ill skip that for now.

    When your finished composing your Twimelbin entry you take the URL at the top of the page and use this to look up your TwiML in your phone number URL.

    Static XML hosted on your own machine:

    Static XML and a Twimelbin response are exactly the same, the only difference that one is hosted on your platform and one is hosted by Twimelbin. There are benefits to both; I won’t go into the merits of self hosting vs a 3rd party for any kind of HTTP activity here.

    Dynamically generated TwiML response: 

    This is where is gets fun! With a dynamic script we can make our message be customised to the caller, the time of day, the weather or any other factor we want! Lets say for example that we have two callers; Mathew and Steve. Mathew’s number is +44123456 and Steve’s is: +44987654 as we are generating this response on demand we can input these names into the <Say> response and give the caller a more personal response.

    In this example I’m using PHP, but you could easily use another web language.

    <?php

    $people = array(
    “+44123456″=>”Mathew”,”+44987654″=>”Steve”);

    // if the caller is known, then greet them by name
    if(!$name = $people[$_REQUEST[‘From’]]) $name = “Caller”;

    // now greet the caller
    header(“content-type: text/xml”);
    echo “<?xml version=\”1.0\” encoding=\”UTF-8\”?>\n”;
    ?>
    <Response>
    <Say>Hello <?php echo $name ?>.</Say>
    </Response>

    In this example, I made an array of data – mine and Steve’s number and then used the array to look up the name, if either Steve or I called the Twilio number from those numbers it would say Hi ‘Steve / Mathew’ if none of the numbers were recognised the caller would be just greater as just a ‘Hello Caller’

    You can use the same kind of dynamic scripting language to play specific files, this could be to either specific times of the day, caller ID’s or special events.

    I won’t go into the code here but the basic set up is:

    IF event is true

    Do this

    Else (if not true)

    Do this

    So for example:

    If time = before 12

    Play the morning MP3 file

    Else (If not true)

    Play the Afternoon MP3 file

    an example of this in PHP would be:

    <?php

    if (date(‘H’) < 12) {
    $mp3_file=”http://domain.com/morning_mp3.mp3″;
    }
    else
    {
    $mp3_file =”http://domain.com/afternoon_mp3.mp3″;
    }

    // Play the AM / PM file to the caller
    header(“content-type: text/xml”);
    echo “<?xml version=\”1.0\” encoding=\”UTF-8\”?>\n”;
    ?>
    <Response>
    <Play><?php echo $mp3_file; ?></Play>
    </Response>

    When this script is called it will check the time, if the clock is before 12 it will fetch the morning MP3 file and if its in the afternoon  it will fetch the afternoon mp3 file. You could go one step further and make an evening file. But for this setup lets assume an morning and afternoon setup 🙂

    So whats a bot?

    In simple terms a bot is a program / application that just does one thing. In the use case here you could have a phone bot that people could ring and it would recite company open hours.

    Example:

    http://twimlets.com/message?Message%5B0%5D=Hello%20and%20welcome%20to%20Mathew’s%20super%20store.%20Our%20open%20hours%20are%208%20AM%20to%207%20PM%20Monday%20to%20Friday.%20&Message%5B1%5D=We%20are%20open%20Saturdays%2C%20from%2010%20AM%20to%203%20PM.%20We%20are%20not%20open%20Sundays&Message%5B2%5D=Have%20a%20nice%20day.&


    This Twimlet just informs the callers of the times, Mathew’s superstore will be open.


    So more recently I have been playing around with cloud technologies, namely building a cloud based hosting platform to replace an ageing home-based server solution. Don’t get me wrong my little Mac Mini server has been phenomenal, but the more recent releases of Mac OS X Server have left me wanting a bit more control and a bit less hardware.

    Enter Digital Ocean (shameless referral plug: https://www.digitalocean.com/?refcode=8dc34df963c1 ) who allow you to build a very quick virtual machine capable of handling mail, HTTP and other web service based systems (that I have now retired and / or moved to the cloud).

    One of the more recent projects I have wanted to build is a private branch exchange (PBX (Phone network)) so that I can adopt a singular 1 number per country approach, i.e. have a US based number that people can call and SMS, a UK based number that people can call and SMS, etc. This would save giving people a whole lot of different numbers – when Im in the UK ring a local uk number when I’m in the US ring a local us number..

    Following lots of sniffing around for how to install PBX software onto a hosted platform I stumbled across this document: https://www.digitalocean.com/community/articles/how-to-install-freepbx-on-centos-6-4

    I’m not going to copy and paste the guide word for word as its fairly self explanatory. If you have any problems following the guide, check out the comments at the bottom of the page as they helped.

    From here we need to configure three things; Trunks (Calling in and Out), Extensions (Phones to answer the calls) and Routing (What calls go where based on logic).

    First lets get extensions setup, its the quickest way to test your PBX is working correctly.

    Navigate to your server and login to the FreePBX login it should be something like: YOURDOMAIN.com/admin/config.php

    From here you want ‘Applications’ drop down menu and then ‘Extensions’

    We are going to add 2 SIP based devices so select the option for ‘Generic SIP Device’ and then click submit.

    As this is a private PBX I don’t foresee needing a lot of numbers, however a good organisational setup is still good idea. – Don’t go charging ahead into making your first extension ‘1’ and your second extension ‘2’.

    I use the two hundred block for all my extensions, IE the first extension is 201 and the second extension is 202. As I need to add more extensions to the PBX they will become 203, 204, 205, etc.

    The three main values we need to set here, are the user extension, Display Name and secret (password).  If you follow my convention you should setup ‘201’, ‘Mathew’ and ‘mysupersecretpassword’. Once you have setup your first user, do the same again so you have a second user (appending the next extension, username and password).  – Now we can test our PBX. If you have an iPhone – I recommend downloading any of the open VOIP Clients, my fav is ‘LinPhone‘. Its simple, easy to use and you can turn on the debugger if you need to.

    If you have more than 1 phone you can download Linphone to that as well (Or another VOIP client) and try to ring each other. Or if you have 1 phone and your computer look at downloading x-lite (X-Lite)

    To ring another IP phone on your PBX just punch in the extension number, 202 to ring the second phone from the first and 201 to ring the first phone from the second.

    Once you have established that your phones are working we can begin to get calls into the PBX from the outside world.

    Inbound Calling

    First we need to organise inbound calling from Twilio.

    Head over to Twilio.com and sign up for a trial account, you will need an email address and a mobile / cell phone to validate yourself against. Once you signed up you will need to provision a telephone number, you can do this in your account at: https://www.twilio.com/user/account/phone-numbers/available/local

    Next we need to configure what we want to happen with that number when someone calls it, as Twilio uses TWiML (an extremely well documented type of XML) we can set Twillio to make a sip call to our PBX and connect the call over. On a hosted platform place a new xml document. Something like: www.yourdomain.com/twilio.xml

    Our XML needs to look like this:

    <?xml version=”1.0″ encoding=”UTF-8″?>
    <Response>
    <Dial>
    <Sip>sip:[email protected]</Sip>
    </Dial>
    </Response>

    We can also use a Twimlet to perform the same thing (except it doesn’t look as nice as the above XML:

    http://twimlets.com/echo?Twiml=%3C%3Fxml%20version%3D%221.0%22%20encoding%3D%22UTF-8%22%3F%3E%3CResponse%3E%3CDial%3E%3CSip%3Esip%3A201%40YourDomain.com%3C%2FSip%3E%3C%2FDial%3E%3C%2FResponse%3E&

    As you can see, the XML very easy to read, should anyone now dial our newly provisioned number, Twilio will transfer the call to our 201 extension on the PBX. (Almost – we have a bit more setup to do first!).

    Login to your PBX via a root terminal and navigate to /etc/asterisk/ by typing

    cd /etc/asterisk/

    Here we need to edit the sip.conf by typing:

    nano -w sip.conf

    Here we are going to add all the known IP addresses of Twilio so that when one of the gateways makes a request to our PBX the PBX will answer the call and route it accordingly.

    The SIP document held at: https://www.twilio.com/docs/sip contains the list of IP addresses used by Twilio for connections via SIP. To add them to sip.conf we need to add the following to the document:

    [twiliocaller](!)
    context = fromtwilio
    type = peer
    qualify=no
    allowguest=yes

    [twilioip-1](twiliocaller)
    host=107.21.222.153

    [twilioip-2](twiliocaller)
    host=107.21.211.20

    [twilioip-3](twiliocaller)
    host=107.21.231.147

    [twilioip-4](twiliocaller)
    host=54.236.81.101

    [twilioip-5](twiliocaller)
    host=54.236.96.128

    [twilioip-6](twiliocaller)
    host=54.236.97.29

    [twilioip-7](twiliocaller)
    host=54.236.97.135

    [twilioip-8](twiliocaller)
    host=54.232.85.81

    [twilioip-9](twiliocaller)
    host=54.232.85.82

    [twilioip-10](twiliocaller)
    host=54.232.85.84

    [twilioip-11](twiliocaller)
    host=54.232.85.85

    [twilioip-12](twiliocaller)
    host=54.228.219.168

    [twilioip-13](twiliocaller)
    host=54.228.233.229

    [twilioip-14](twiliocaller)
    host=176.34.236.224

    [twilioip-15](twiliocaller)
    host=176.34.236.247

    [twilioip-16](twiliocaller)
    host=46.137.219.1

    [twilioip-17](twiliocaller)
    host=46.137.219.3

    [twilioip-18](twiliocaller)
    host=46.137.219.35

    [twilioip-19](twiliocaller)
    host=46.137.219.135

    [twilioip-20](twiliocaller)
    host=54.249.244.21

    [twilioip-21](twiliocaller)
    host=54.249.244.24

    [twilioip-22](twiliocaller)
    host=54.249.244.27

    [twilioip-23](twiliocaller)
    host=54.249.244.28


    Save the file and now either reboot asterisk or the server. As the server takes seconds to reboot I tend to follow the save command with just

    Sudo reboot

    which reboots the whole thing, as this server is for my own use; I’m less worried about the number of users who I will be kicking off when I do this.

    Once your back up and working again, if you navigate to: FreePBX system status, it should tell you that 20+ gateways are online. With your backup phone or laptop logged in as your SIP extension we set the look up (201 in the above case) you should be able to call your number and your VOIP phone should ring! (Take 5 mins to strut around the room looking proud and ring yourself a few times!)

    Outbound Calling: 

    Outbound calling allows you to make call from your VOIP client via your PBX to the real world using Twilio as the gateway. In short we are going to get Twilio to connect the VOIP client to the rest of the world using the callerID we already provisioned.

    There is a lot of reference material regarding SIP on the SIP Twilio Page (https://www.twilio.com/docs/sip/sending-sip-how-it-works)

    The basics of it include, we need to make a SIP endpoint on Twilio, then when your SIP route references this endpoint, Twilio will make a URL request back to your server to get TwiML to decide what to do with the call.

    Head over to: https://www.twilio.com/user/account/sip/domains and click the button ‘Create SIP Domain’

    We need to create a Twilio SIP domain, pick something nice and unique such as mypbxservername  – Twilio will append .sip.twilio.com onto this so you will end up with a complete string that looks like this: mypbxservername.sip.twilio.com

    Next we need to give it a friendly name, this is just so you can remember what it’s called.

    In voice URL, please fill in:

    http://twimlets.com/message?Message%5B0%5D=Congratulations!%20You%20just%20made%20your%20first%20call%20with%20Twilio%20SIP.

    This will give us a nice uncomplicated message, indicating our success from going from FreePBX to Twilio.

    Next we need to generate a way to protect our SIP endpoint.  As Im using a static IP server I can add this to a white list. Click ‘CreateIP Access Control List’ and a new drop down will appear. Here we want to add the IP address of our server and then give it a friendly name.

    Save all the changes and then save the domain to Twilio.

    Move over to your FreePBX server and add a trunk in the usual fashion: Connectivity > Trunks. 

    Here we need to make a new SIP Trunk; so click ‘Add SIP Trunk’

    Call the Trunk something like ‘Twilio’ and then move down to the next trunk name (again, Twilio). In Peer details we need to add the three points:

    type=peer
    host=mypbxservername.sip.twilio.com
    qualify=no

    Then click submit changes – Ignore an errors you get.

    Then we need to add in outbound route, setting it so that when we dial a number on our extensions, FreePBX knows to route the call to our Twilio Trunk.

    So, lets add a outbound route; Connectivity > Outbound Routes.

    Here, I have set the route name to be ‘Twilio’, now scroll down to ‘Dial Patterns that will use this Route’. We need to configure the PBX so that when we dial a certain prefix, FreePBX will pick up this prefix, remove the prefix and then hand the call over to Twilio to be dialled and connected.

    The window is broken up into three boxes, ‘Prepend’, ‘Prefix’ and ‘Match Pattern’. We do not need to worry about ‘Prepend’ so the next bit we need to add a dial prefix so that the PBX knows we want to use this route. I have chosen the prefix of 71, so if I wanted to dial a phone number of 1 415123 1234 I would dial 7114151231234. Here FreePBX will pick up the 71, remove those digits from the string and then hand the 14151231234 to Twilio for dialling. The last part ‘match pattern’ is used to match we have the right numbers dialled. For example in the US, a long distance number would be 1-415-123-1234 so the match pattern would be 1XXXXXXXXXX as we only want +1 numbers to be routed this way. You could also narrow this down do only a certain area code could be called by doing this: 1901XXXXXXX – where 901 is the area code only accepted.

    To dial the UK on this dial pattern you would need to setup: 44XXXXXXXXXX, again if you wanted to setup only landlines you could do: 441XXXXXXXXX and 442XXXXXXXXX which would limit numbers to only 441 and 442 (as in 44 1895 and 44 208).

    You should now be able to dial a real number from your PBX extensions and you should hear ‘Congratulations, You just Made your first call with Twilio SIP’. PERFECT! This means that your FreePBX box was able to hand over a call to Twilio, and Twilio was able to execute the message we predefined earlier!

    Now we need to modify our Twilio URL so that it points to a file we can use to dial our actual end point. On an internet facing server create a new file called asterisk.PHP

    to which we need to add:

    <?xml version=”1.0″ encoding=”UTF-8″?>
    <Response>
    <Dial callerId=”+YOURCALLERID”>
    <Number><?php preg_match(‘/:([0-9]+)@/’, $_POST[‘To’], $matches); echo $matches[1]; ?></Number>
    </Dial>
    </Response>

    You need to append YOURCALLERID with a caller ID from your account, either a verified number or one of your Twilio numbers. This will be the caller ID used when your PBX dials out via Twilio.

    Now take the internet facing location of this file. I’m going to assume: http://domain.com/asterisk.php  – Just update the URL location that was Twimlets message of congratulations with your URL. This should now setup your PBX so that when it makes a request to Twilio, Twilio looks up the URL and injects the TO number into the TwiML, followed up by dialling that number.

    Tada!! That should be it! You should now be able to dial your PSTN number and have it call your PBX extensions and you should now be able to dial out from your PBX to PSTN lines using Twilio!